Hi there.....
So, there is very little time before we start showing off our squares and I wanted to give you more info about how we are going to be doing that.
The list of people who are planning to get involved is growing and I'm going to be creating linking parties for each day/pattern so we can see what everyone is doing...don't worry if you don't get your square done on the day suggested....I'm going to leave the linking parties open until the end of the summer!
The first way to share your photo's is through the linking parties. You can up load pictures from your computer or from you blog.
There is also a Ravelry group you can join and add your photo's there. Here is the link to the page on Ravelry that explains how to add pictures to the group....before starting this CAL I had no idea how to do this....I guess you really do learn something new everyday! Be sure to link your projects back to the original pattern on Ravelry to show the designers how much we love them!
Also, be sure to check out the blogs of your fellow crocheters and leave comments....it feels awesome to see people commented on your projects!
Thanks again for getting involved and I look forward to crocheting along side you!
Melissa
Friday, April 29, 2011
Crazy Hair Day!
Today is crazy hair day at Kade's school so we decided to do something a little wild!

I know some mom's may think I'm crazy for letting my little boy do this (I did it really) so I feel like I need to explain my excitement!
When we found out we were pregnant, my love was convinced we were having a girl. So we thought about girl names and girl clothes and girls hair and I feel in love with the idea of having a baby girl to craft for and enjoy! So when the doctor told us we were having a boy I was a little disappointed.
I tried to be positive but really I sulked for a few days...until I saw a little boy at the mall about the age Kade is now with the coolest mohawk and I realize that boys can be really fun too! I have been waiting for the day when my little guy could sport the mohawk with pride and I'm glowing because that day has arrived....And he loves it too!
Enjoy the photos!


A MOHAWK!
I know some mom's may think I'm crazy for letting my little boy do this (I did it really) so I feel like I need to explain my excitement!
When we found out we were pregnant, my love was convinced we were having a girl. So we thought about girl names and girl clothes and girls hair and I feel in love with the idea of having a baby girl to craft for and enjoy! So when the doctor told us we were having a boy I was a little disappointed.
I tried to be positive but really I sulked for a few days...until I saw a little boy at the mall about the age Kade is now with the coolest mohawk and I realize that boys can be really fun too! I have been waiting for the day when my little guy could sport the mohawk with pride and I'm glowing because that day has arrived....And he loves it too!
Enjoy the photos!


Thursday, April 28, 2011
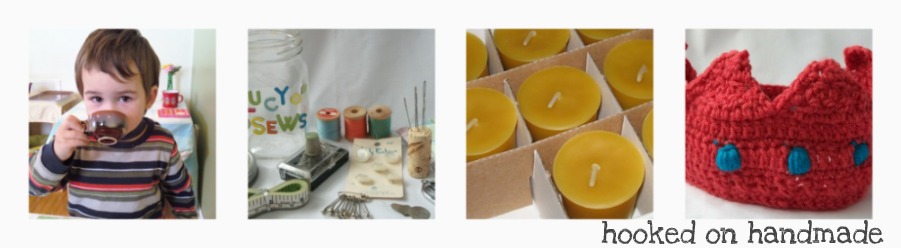
A Hookers Best Friend!
So, I've spent the last month working on squares to display throughout the month of May and I've become attached to the hook that has seen me through this unique experiences.
This hook really isn't special...it's a simple size 5.5 hook that I can't even remember buying but I feel like this hook and I have bonded in a way I never had with a hook before. This blanket is by far the biggest project I've worked on and it isn't even close to being done but before I start posting my squares and forget about my hook.....here she is, for the world to see....

I just decide, while I was waiting for my picture to load, to do my first linking party! Take a picture of hook you are using or are going to be using to make your squares for this CAL and post it here...This may be silly, but I love silly!
Thanks for stopping by and sharing with me,
Melissa
Wednesday, April 27, 2011
Baby Blanket!

I found out a couple of weeks ago that my cousin is having a baby! I love babies and making anything that has to do with them....we don't know yet what she is having but I couldn't wait to get this started, so I picked up what I think is a healthy blend of colors and I'm going for random!
I've been looking for an excuse to use Lucy's, over at Attic24, Summer Garden Granny Square Blanket , and this seemed like the perfect chance.
Like I said in my last post, this is going to be the summer of blankets for me! I will be posting a square a day for each day in May (so excited about that), will be working on this baby blanket and will be making a blanket for my brothers wedding (that will be a secret blanket...sorry). I'm generally not into making big projects. I like the instant gratification of small projects but I'm excited to see these blankets unfold!

Here is my basket of yarn!

Thanks for stopping by!
Monday, April 25, 2011
Less then a week!!!!
Hi everyone,
My blog has been a bit boring as of late, sorry for that! I haven't been crocheting anything other than the squares for the CAL and this afternoon I finally sat down and took photos of the squares I've made so far.....
But, since I'm not allowed to reveal them until next week, I thought I would post the pictures I took of the pile of them and the little love of my life!


This spring is devoted to blanket making....not only have I been working on the 'square a day in may' blanket but I also started a baby blanket for my cousin and decided on the pattern for my brothers wedding blanket...I never thought I would enjoy making blankets but I really do!
Hope you all had a wonderful Easter weekend,
Melissa
Wednesday, April 20, 2011
Mind the corner!
Hi everyone,
I thought I would post a link to Adaiha's blog and the post she did about her experience with corners and attaching squares.
I know many of you have started working on the squares and as I've been working on them I have noticed that many of them do not leave space in the last row at the corners. In the post you can find here, Adaiha explains the importance of having at least 2 chains in each corner.
As I understand it, if you don't leave that space you will have a difficult time when we are attaching the squares. So, I'm making sure that as I'm doing the last row in each square I'm making at 2 or 3 chains in each corner. This is easy to do and will save you time and energy when it comes time to join....just though I would give you the heads up!
Sorry there have been zero pictures on my blog lately! I have been crocheting nothing but these squares for a couple of weeks not and have had no projects to share...I am resisting taking pictures of my squares because I don't want to share them until the time is right!
Crochet away!
Melissa
How to adjust the size of your granny!
What a funny title for a post!
Anyways, my friend Adaiha over at 'things to make and do', has added a post to her lovely blog about how to make granny squares bigger when they don't quite make the grade (or the person who organized a CAL picked the wrong size squares...sorry about that!
It is a great blog post full of pictures, so stop by and check it out here!
Thanks Adaiha for all your hard work!
Melissa
Sunday, April 17, 2011
Let the count down begin!
I can't believe that there are only 2 weeks until the CAL starts!
Needless to say I am very excited and can't wait to see all the lovely squares everyone will make. As I work my way through the squares on the list and pick my colors I fall in love with each one and know that when they are all put together they will make a blanket that will not only keep me and my family warm, but will also bond me to you and your family.
Thanks again for joining me on this crocheting adventure and I look forward to seeing all your lovely creations!
Melissa
Saturday, April 16, 2011
Square sizes!
Hi Everyone,
Hope everyone is doing well and looking forward to make squares!
When I was picking the squares for us to make I thought I picked squares that were 12 inch but as I've been working my way through the patterns I've realized that some of the squares on the list work up smaller then I expected.
Adaiha, at 'things to make and do' will be doing a blog post about how to make 6 or 8 inch squares into 12 inch ones but if you're working your way through the square early (as I am) just continue with the pattern until your square reaches 12 inch.
Hope this helps....
Melissa
Thursday, April 14, 2011
The Granny Square Queen!
As you may already know, I got the idea for my Square a Day in May from my new and lovely friend Adaiha, over at 'things to make and do'. She is working on a granny square a day for the entire year and while the thought of that excites me, it also is much to big a project for me. As far as I'm concerned, Adaiha is the Queen of all things Granny Square.
When I started planning my CAL, I asked Adaiha if she would be willing to do a couple of guest post about how to make a smaller square bigger, how to join squares and any other square related issues she has over come and could share. She had already been thinking about doing a series of blog posts on such issues, isn't that just the way the world works!
Today she revealed the first part of her tutorial on the basic granny square. You can find it here .
Adaiha is also going to be doing a tutorial on her prefered joining method which is what I plan to use to join my squares at the end of the CAL. Don't worry, I will be featuring her blog post here on my blog at the end of May.
Be careful, I often get lost on her beautiful blog and must make granny squares for hours after....which is all I've been doing these says!
Monday, April 11, 2011
Becky's Photo Blog!
My good friend Becky is in the mist of putting together her very own photo blog.
She is hoping to start generating an income from her photos and I suggested that she start a blog....
She just put up her first post and I'm in one of the pictures....here it is!

You should hop on over and check it out....Here is the link!
She has also asked me to make some props for photo shots...I'm looking forward to make some baby wares and I will be sure to link to here photos when I do.
Have a great evening everyone and happy crafting!
Melissa
Friday, April 8, 2011
Tutorial: Bee in Love Mason Jar Cover

We love bees in our household! I have had a strong connection to bees my whole life (the name Melissa literally means honey bee) and found a man with just as strong interest in them. We have since passed on that love to our little boy, who has almost no fear of bees and eats honey every night for dessert.
Not only are bees beautiful interesting little creatures that can teach us humans many things they are also necessary for the survival of humans. Bees (and other critters) are responsible for the pollination of almost everything we eat and, in my humble opinions, should be loved and celebrated.
I also have way to many mason jars in my home. While playing around on Ravelry around the holiday's I found this wonderful mason jar cover tutorial on Nature Nut Notes Blog. I made on that evening and have been making my own versions of them ever since.
So here is my ode to bees and mason jars, a great stash buster, that is pretty and functional. I picture fresh picked flowers pouring out of the one we now have and hope this projects inspires you and brings us that much closer to spring!
 What you will need: An old mason jar, small amount of yellow, white, black, pink (not shown) yarn and a size 4.5 mm crochet hook. Later you will also need a hot glue gun!
 With black yarn, chain enough to wrap snugly around your mason jar.
 Join with a slip stitch to form a loop, trying not to twist the chain. Chain 2. Make one double crochet in each chain space around. Join at the top of the chain with a slip stitch. Do no fasten off.
 Chain 2 with the yellow yarn. Make one double crochet in each double crochet of last round.
 At the end of the first yellow row, tie the ends from the yellow and black yarn tightly. Continue making 1 double crochet in each double crochet of the round before, alternating between yellow and black yarn, not cutting the yarn at the end of each row but drawing up the color needed.
 Stop when you have reached the top of the jar, where the jar starts to curve inward or as close as you can to the top with the yellow yarn.
 With the black yarn, work one row of single crochets. This row of single crochets will make the row tighter. Fasten off and weave in the ends. Your cover is now done!
  If you turn the cover inside out, you should be able to see the yarn you drew up with each row. (For some reason I love how neat and organized this is!)
 With the 4.5mm hook and the white yarn, chain 10. Make 2 double crochet (dc) in the 2nd chain from the hook.
 Half double crochet (hdc) in each ch to the end. Make 3 hdc in the last chain.
 Working along the other side of the ch, hdc to the end. (7 hdc)
 Make 2 more dc in the same space as the other dc from the beginning of row. Slip Stitch to join.
 Ch 2, 2 dc in the next dc, 1 dc. hdc in next 7, 2hd, 1hdc, 2 hdc. hdc in next 7 hdc along the other side. dc in first dc, 2 dc in next. Ss to join. Row 2 complete! Your wing will now start to curve...that's a good thing!
 For row 3, ch 3. 2 dc in the next dc, twice. 1 dc. 8 hdc across. 2 hdc in each if the next 3 st. 8 hdc along other side. 1 dc in next dc, 2 dc in each of next 2 dc, ss to join.
 Now make another one.....bees actually have 2 sets of wings but my son insisted that I only make 1 set!
This is a good time to make your heart! I make the medium sized heart by June over at PlanetJune. You can find the pattern here. I choose a bright pink but you can use what ever pink or red you have in your stash!
Now it is time to put this bee together! I folded my mason jar cover in half with the seam down the middle and facing the back. I then put a small piece of cardboard inside so the glue from the hot glue gun didn't sick to back of the cover.
 Lay out the wings where you want them, I put mine in the middle but you could put them higher or lower.
 Flip them over and put a small amount of hot glue on the smaller end (the end made up of hdc). I wanted my wings to flap, that's why I only put a small amount of glue. Do the same thing for the other wing, pushing down firmly!
 Ta Da!
 Cover the back of your heart with hot glue and place it on top of the wings in the center.
 You are done!
You could also sew on your wings is you do not have a hot glue gun but I'm a little obsessed with mine right now so I wanted to use it!
Now fill your jar with flowers or pencils or, as ours is currently being used for, paint brushes and enjoy!
Thanks for stopping by my blog! Hope to see you again soon!
Also, check out the link to Robins Blog....I'm featured over there!

Wednesday, April 6, 2011
Spread the Word!
Hi Everyone,
I'm glad to say that Melinda over at MoCrochet has featured The Square A Day In May on her Blog!
Melinda's blog is great and her patterns are beautiful! They are fun and interesting and challenging, everything I like in a square. I didn't even realize but we will be making 6 of her squares in May (I'm working on Falling Star right now!)
Here is the link to her blog !
You may be wondering how I picked the squares we will be making, and the answer is really very simple....I picked patterns that looked fun and pretty! I did a search on Ravelry for 12 inch squares and then picked the ones that jumped out at me. I tried to put ones that looked harder between squares that looked simpler but I didn't really know. Some of the squares that looked hard turned out simple and vise verse.
I hope you enjoy exploring Melinda's blog and have fun crocheting her squares!
Melissa
Friday, April 1, 2011
Let the count down begin!
There is officially one month until the Square a Day in May starts and I'm kinda freaking out about!
Don't get me wrong, I am super excited for this event and I'm glad that others are interested in crocheting along with me, but I'm freaking out because it is going to be a lot of work.
Not only will squares need to be made but blog posts will have to be written and linking parties will need to be set up! Wow...my heart is racing.
I have decided to get started on my squares early and suggest others do the same! I want this event to be relaxing and fun so if you want to start early go for it! Alternatively, if you can't keep up, take your time! Don't rush yourself! The links will stay open for awhile and I'm planning to keep the page up with the list of patterns for as long as people want it there!
Okay, this post some how made my stress levels go down but I'm sure you will see more of these over the next 2 months. I keep telling myself, and I know it is true, that all of this work is going to be totally worth it! I'm going to have an amazing unique blanket that I made myself! Too cool!
Happy Crochet,
Melissa
A week of crazy!
As the title of this post implies, this week has been crazy!
Work has been busy, life has been busy, and my mind has been busy which means less crafty crafting for me. I have managed to finish the shawl I was working on for my friend Becky's wedding next weekend and make up a few squares for the crochet along next months!
Here are some photos of the shawl I made for Becky....This pattern was fun, fast and easy to make. You can find the pattern here


This weekend is going to be nuts! Cocoa Club at the library is starting up again tomorrow, I have to work for a couple hours and it is the grand opening at the fitness studio I belong to, so I'm going to be taking classes, too!
Hope you all have a great weekend and enjoy the nice spring weather....I know I will!
Melissa
Where this post is linked...
Subscribe to:
Posts (Atom)